


How to Hang a Tapestry on a Concrete Wall?

There are different ways to hang a wall hanging, but some of them can leave holes in your walls, and that may not be what you want. If you're renting and your landlord won't let you put holes in his concrete walls, you'll have no choice but to drop your drill (not on your feet, mind you).
Don't worry, there are simple methods to install your draperies on a concrete wall without making holes and without drilling (a relief if you don't have a drill at hand). These methods are also perfect if you have a curved wall or simply don't want to drill holes in your drapery.
Both of these methods will keep both your walls and your security deposit intact. And the good news in all of this is that you don't have to be a DIY whiz to do it! 🂡
THE VELCRO METHOD

It's almost the same method as hanging your wall hanging from the ceiling. The Velcro allows this "scratch" effect that we find on the closures of sneakers for children. This Velcro method will allow you to remove your hanging very easily to clean it. You will also be able to easily change the hanging according to your tastes to create a new atmosphere.
So get a ruler, a pencil, and some adhesive Velcro, then follow these steps.
- Step 1:
Cut four strips of Velcro, each about 4 inches long, for each corner of your wall hanging.
Tip #1: Depending on the length and weight of your hanging, you may want to add additional Velcro strips on the sides. The hangings we offer are generally flexible, so one strip per side for a total of four strips will work perfectly.
Tip #2: Use a pencil to mark points on the wall to delimit the location of your hanging.
- Step 2:
Place the Velcro strips behind each side of your hanging one by one, making sure to press down so that the adhesive side sticks to the hanging. Make sure the soft side of the Velcro is placed on the side of the hanging, and the rougher side (with the mini hooks) is placed against the wall.
Tip #3: For extra adhesion, you can sew the soft side of the Velcro to the hanging using the same color thread.
Once the Velcro strips are positioned on the back side of the hanging, gradually place each side of the hanging one after the other on the wall, making sure to press down enough so that the adhesive sides stick. Your hanging is now hung and perfectly stretched on your wall.
Tip #4: For even more adhesion, use your hot glue gun and apply hot glue along the Velcro strip in contact with the wall.
Tip #5: Use Command brand Velcro tapes, whose technology leaves no trace on your wall.
THE DOUBLE-SIDED TAPE + CLOTHESPIN METHOD
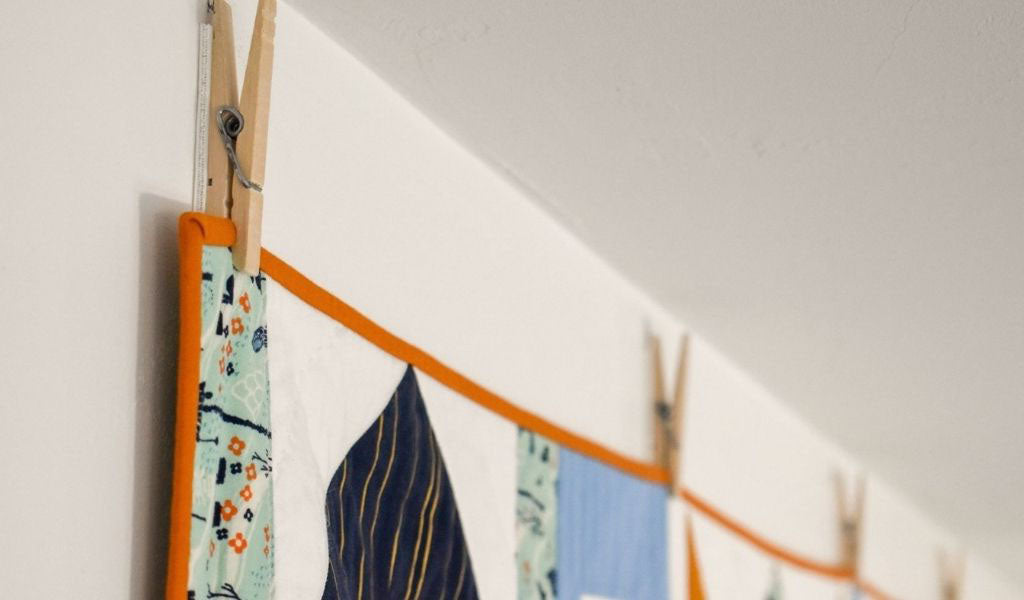
This method is suitable for thin hangings, so if your hanging is thicker, opt for the Velcro method instead. ☝️
This simple technique hangs your hanging by clips, just as you would hang a sheet on a clothesline. By hanging your hanging by clothespins, you can easily remove it for cleaning or change the hanging to suit your taste at the time.
So get yourself some double-sided tape and small to medium sized wooden clothespins.
- Step 1:
Cut a strip of tape of the same length for each clothespin. You can use three clothespins (one for each end and one in the center), or add more if necessary.
- Step 2:
Place a strip of tape on each clothespin, pressing down well so that the adhesive side sticks to the clip. Then attach each clothespin to the wall, making sure to press down firmly.
Tip #6: Use a pencil to mark points along a horizontal line so that your clothespins are properly aligned.
Tip #7: For extra adhesion, use a hot glue gun to attach the tape strips to the clothespins.
- Step 3:
Once all the pegs are aligned horizontally on the wall, simply hang your hanging with the pegs.
That's it, you're done! Now you can enjoy your hanging and the warm effect it has on your room.